


Photography Education & Resources For Creatives
Photography Education & Resources For Creatives
Premium Resources For Photographers
Photography Breakdowns
I’m thrilled to announce a special project I’ve been quietly working on—a complete, master-the-basics guide on natural light photography called Simply Exposed: Mastering the Basics of Natural Light Photography.
But instead of waiting until it’s fully finished, I’m sharing it with you as I write, piece by piece, totally free, directly through the email list and also publicly here on my website. My hope is that by releasing each chapter one by one, we can explore, practice, and grow together in real-time.
This branding shoot wasn’t built around perfect framing or polished poses. It was built around connection. In this breakdown, we’ll explore how to use composition, movement, and creative instinct to build a gallery that doesn’t just show a brand—it feels like it.
This is for the photographers learning to trust their eye, bend the rules when they need to, and create work that people remember.
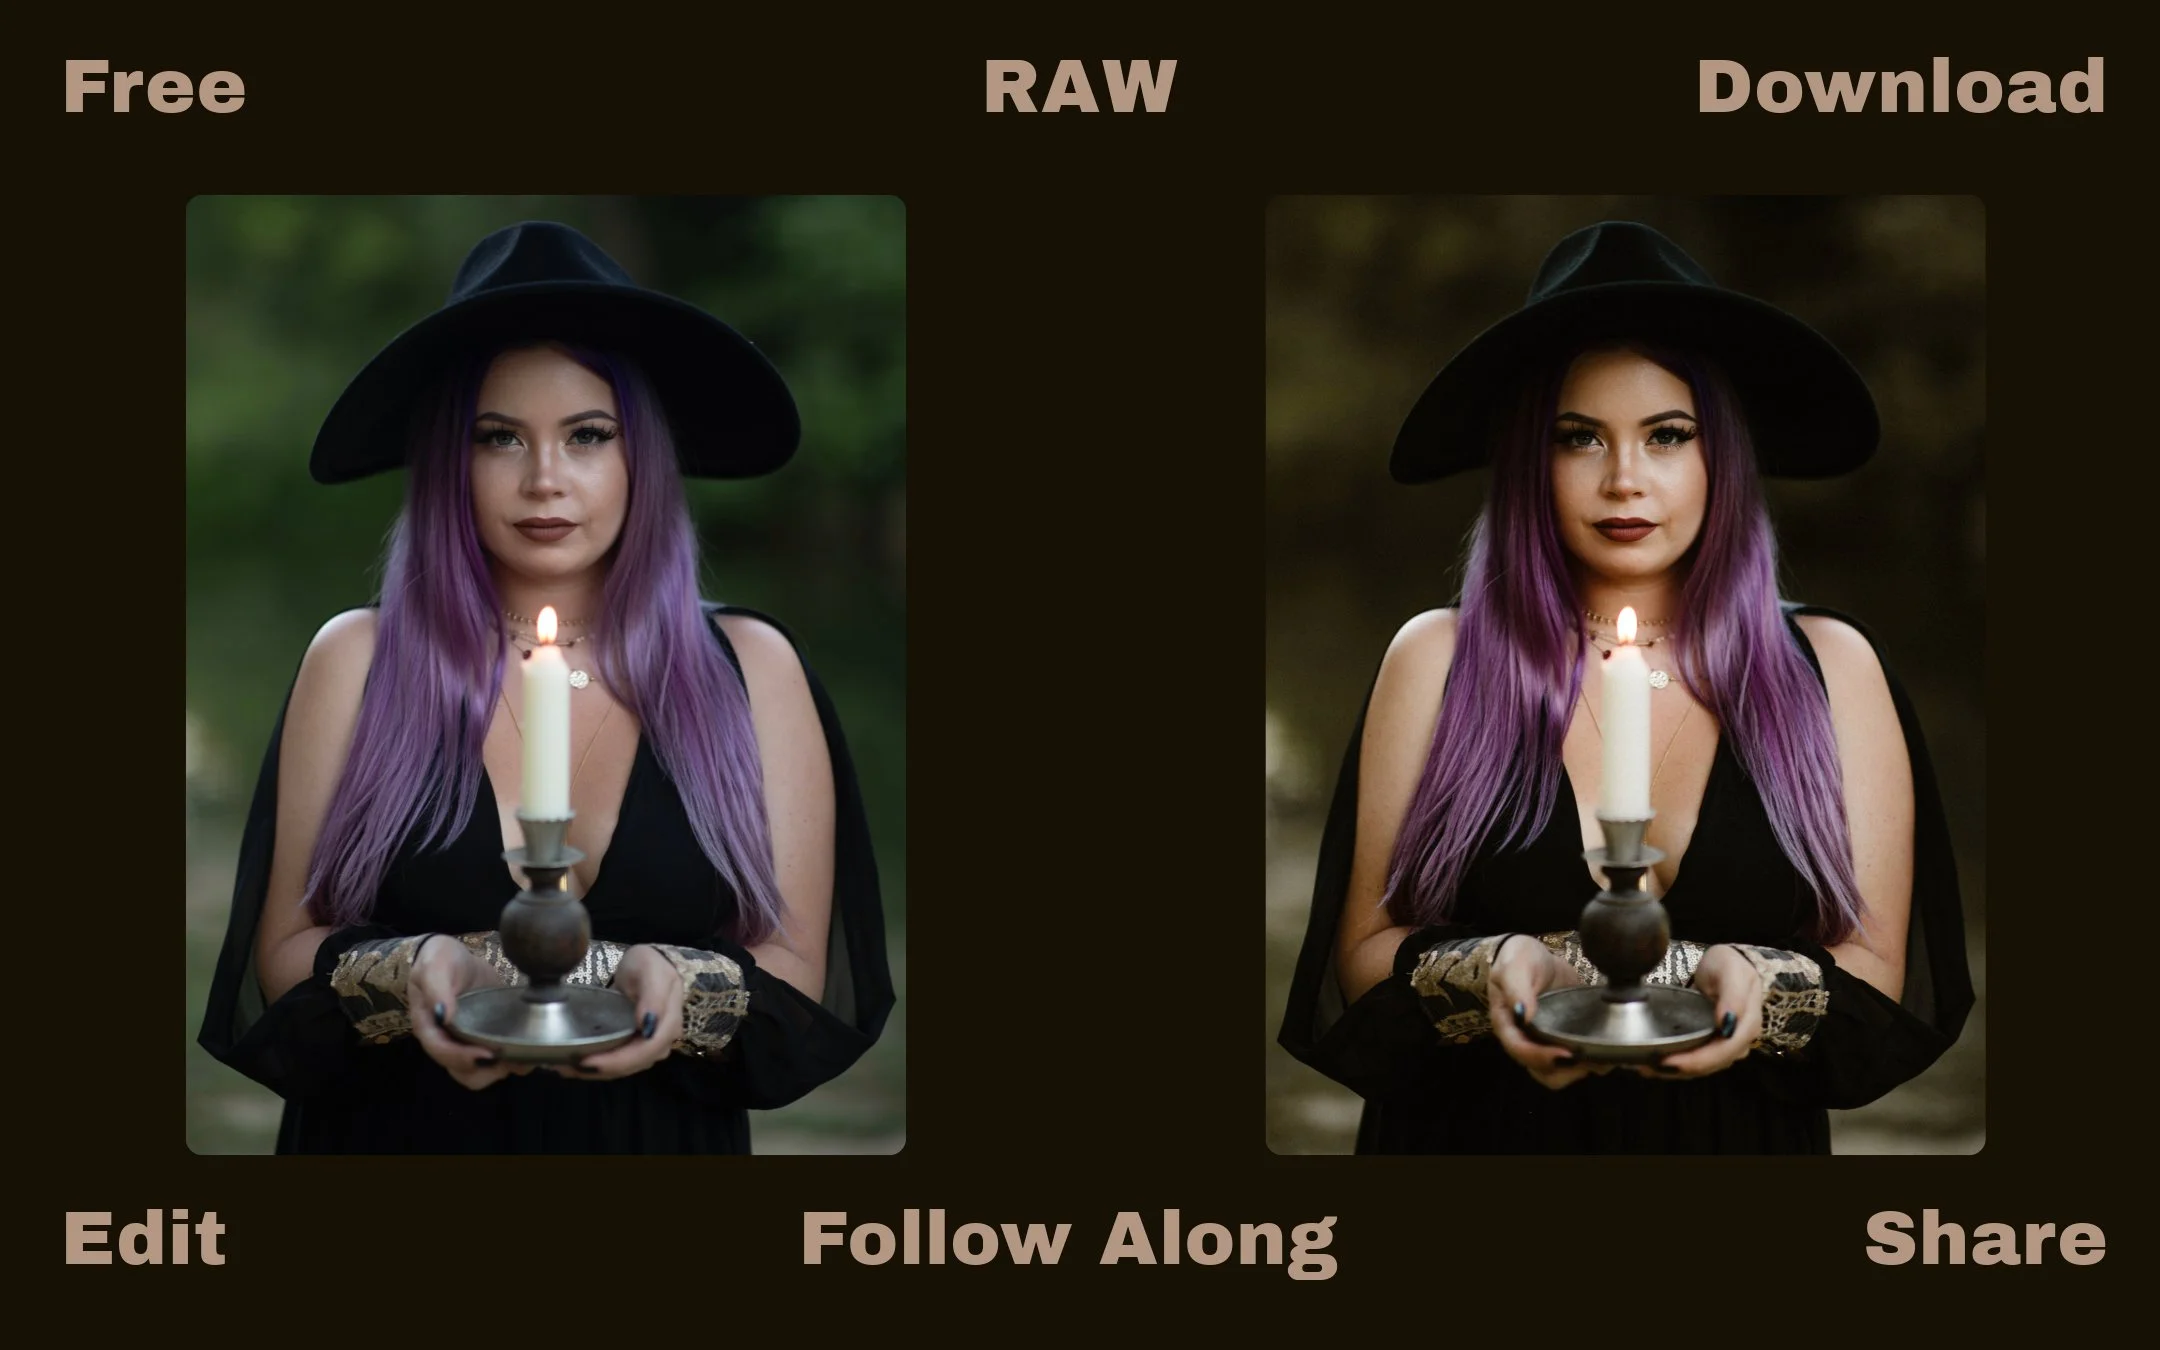
Learn how to capture real emotion and moody, cinematic portraits without fake posing or styled shoots.
This guide breaks down 5 beginner-friendly storytelling techniques to elevate your couple sessions and build a portfolio that feels honest, not staged. Perfect for portrait and elopement photographers.
This time, we had a whopping 20 minutes to capture some getting-ready moments. Sure, I was feeling a touch of 🫣 inside. But part of photographing real weddings means creating genuine moments when things are running behind schedule!
I like wedding photography that throws you straight into it!
The kind of photos you can genuinely feel. That’s what I'm after here. Not just snapshots of a money dance and reception. But cinematic photos that capture energy, culture, and celebration.
Ok, but how?
I’ve seen these arcade portraits for years. In arcades. With neon lights everywhere. And just an overall fun and creative vibe.
And I’ve wanted to do a shoot like for equally as long!!
Well how come I never have?
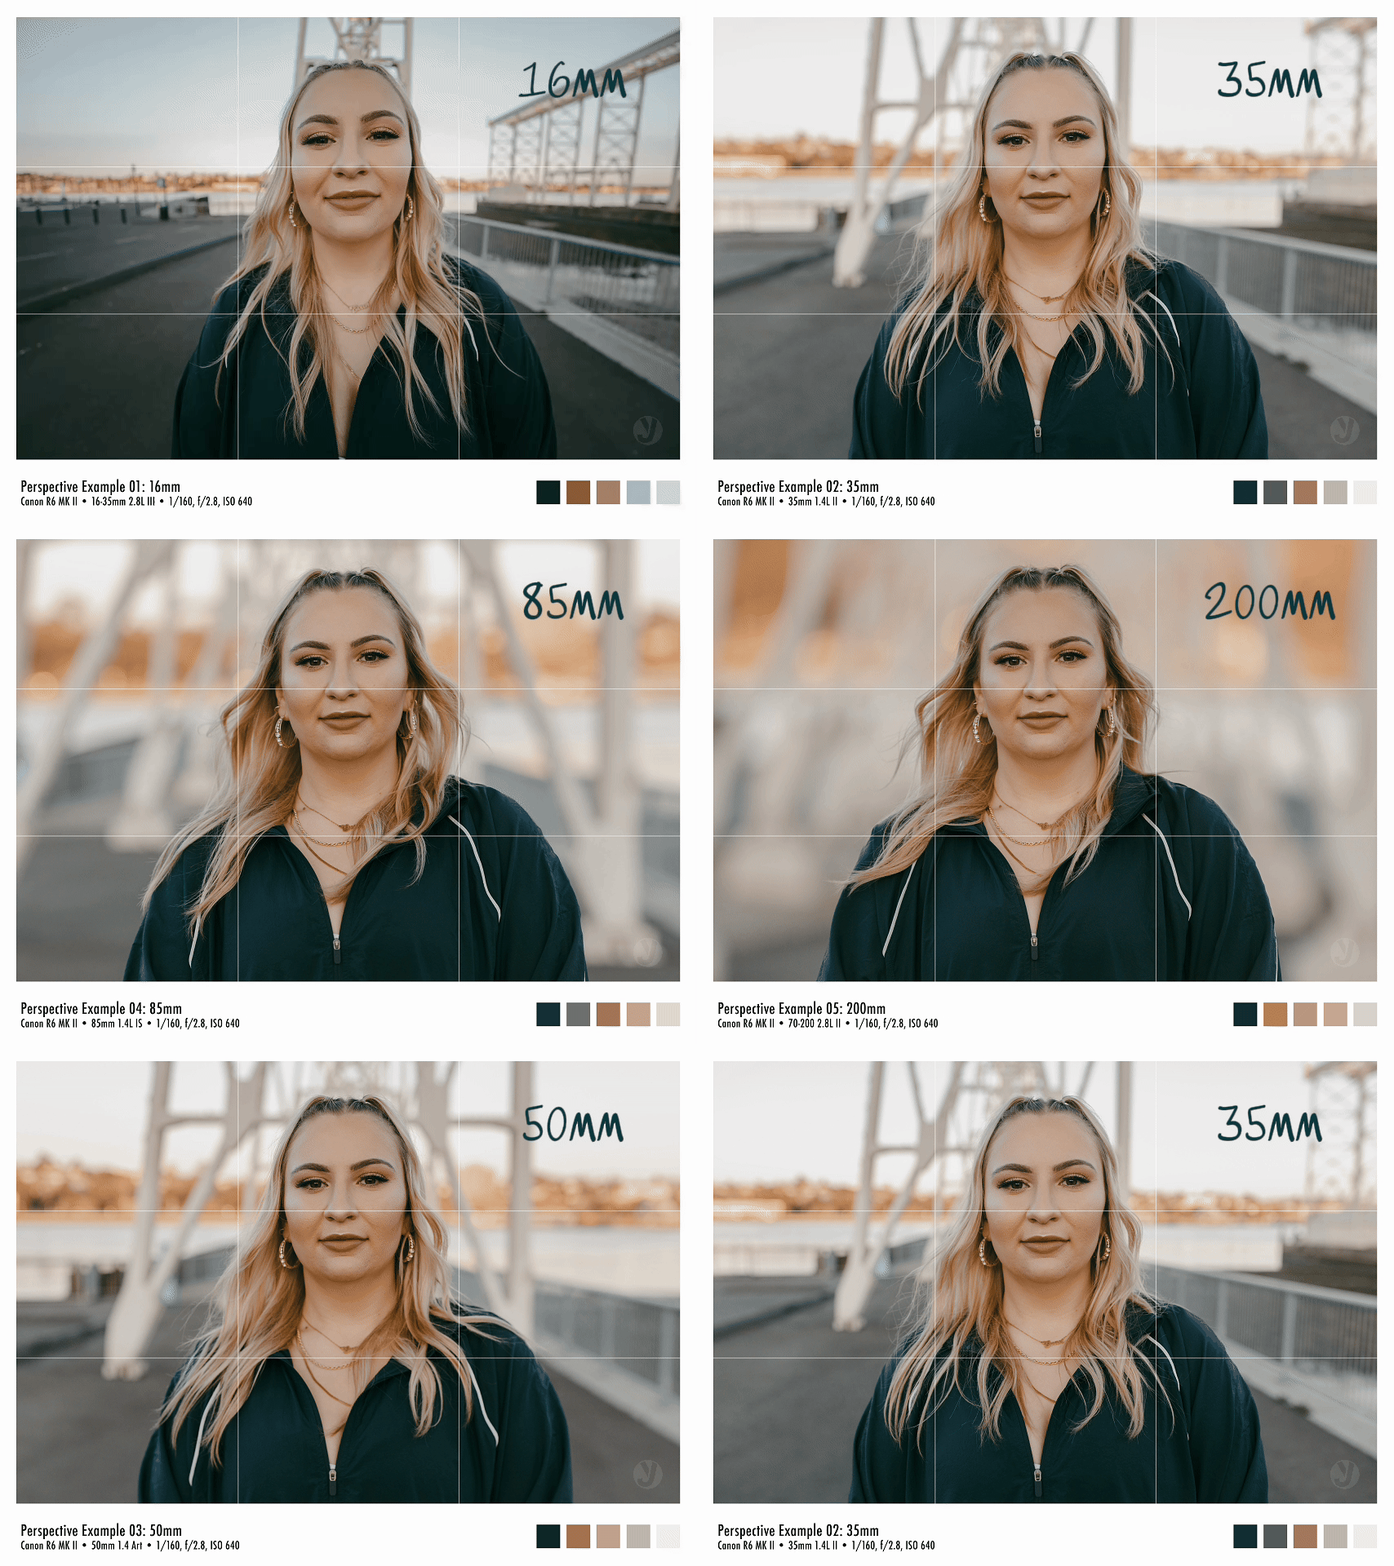
In addition to focal lengths changing how much you see; they change how objects relate to each other in an image. This set of portraits demonstrates how perspective distortion and background compression shift as the focal length changes.
The owner of Bebe Le Strange reached out to me and she had a problem that a lot of clothing brands face: her product photos were fine, but they weren’t stopping anyone in their tracks. And she made it clear to me in our first call: "NO PLAIN ROLLER BACKDROP STUDIOS! WE ARE NOT MEANT TO BLEND IN WITH EVERYONE ELSE!"
Let's talk about wide shots vs longer, telephoto shots, why I switch lenses/focal lengths, and how those focal lengths feel in the end result.
Its the big moment. Ceremony time. The church is beyond beautiful. People are walking down isles, uncles are filming with iPad's, and I'm sweating bullets because its darker than a cave and I have to shoot ISO 2,000. 😂
Here's a few techniques drawn from a sparkler send off during a wedding. From using leading lines to create depth, and how to use perspective to create a set of images that come together to create a story.
Believe it or not, we were given 8 minutes to take these photos. Sure, I was panicking on the inside. But part of photographing real weddings means creating real moments, real fast.
Couples Session Style Guide - Ready To Use and Fully Editable Template
Free Business Resources For Photographers
I gave AI one portrait of myself to try the new image generation features.
What did I prompt?
🎨 25 Style Prompts to Find Your Visual Voice
Want a head start? Here are 25 prompts based on the styles I tested—plus a few curveballs worth exploring.
Try these directly in ChatGPT:
Clear answers to your top photography questions: best lenses for portraits and weddings, smart camera-buying tips, mastering white balance, handling harsh sunlight, and proven strategies to gain clients fast. Ideal for beginners and aspiring pros—get unstuck and grow your photography skills today!
Ever found yourself spiraling because a client used an awful filter on your photos—and you assumed they did it to undermine your artistry? Or you took a critique as a personal attack and responded with a defensive explanation instead of empathy and grace? If this sounds familiar, you’re not just damaging your reputation—you’re actively hurting your business.
By helping empower people to step in front of your camera, you yourself become higher value as a photographer.
Photography is a gift, and photographers who show effort are the ones who tend give the gift of photography to more clients.
So you want more expressive couples? More visually interesting stories to tell about the people you photograph?
Well here's how I go about it. Quite frankly, sometimes it feels like we're having too much fun at our sessions.
Over worked, under paid, burnt out, under appreciated, and eye strain from editing. And you get the text: "Sorry, we ended up booking another photographer." If there even is a text.
It hurts.
We always hear "in order to increase your prices, you have to add more value"...
Great...
How?
Remember, your dream client is already voting with their dollar. Listing prices with photoshoots is a sure sign you're actively branding your photography business like a commodity. Try converting a photo session into an offer so good, your dream client would feel crazy saying no.
I’ve read a lot of books centered on a few topics. Business development, personal development, spirituality, health, autobiographies, and memoirs. The following list is my growing list of books I think every creative business owner should read at least once.
Every book listed has made me a better businessperson, partner, and human.
Free Tutorials For Photographers
What this breakdown will actually teach you:
1. The exact settings we used in Lightroom—so you’re not left guessing or “eyeballing it.”
2. A step-by-step breakdown of how we shaped the image—exposure, tone curves, grain, and everything in between.
3. specific refinements that turned a one-click preset into an artwork with emotion and depth.
What this tutorial gives you:
🛠 The exact settings we used in Lightroom.
⚙️ A full breakdown—from exposure to tone curves to grain.
🎯 Plus the 5 refinements we made to turn the one-click preset into a finished masterpiece.
You can follow along step-by-step—
or skip the trial-and-error and grab the Lightroom Preset Playground, which includes Sunset Blvd and a bunch of other ready-to-click styles.
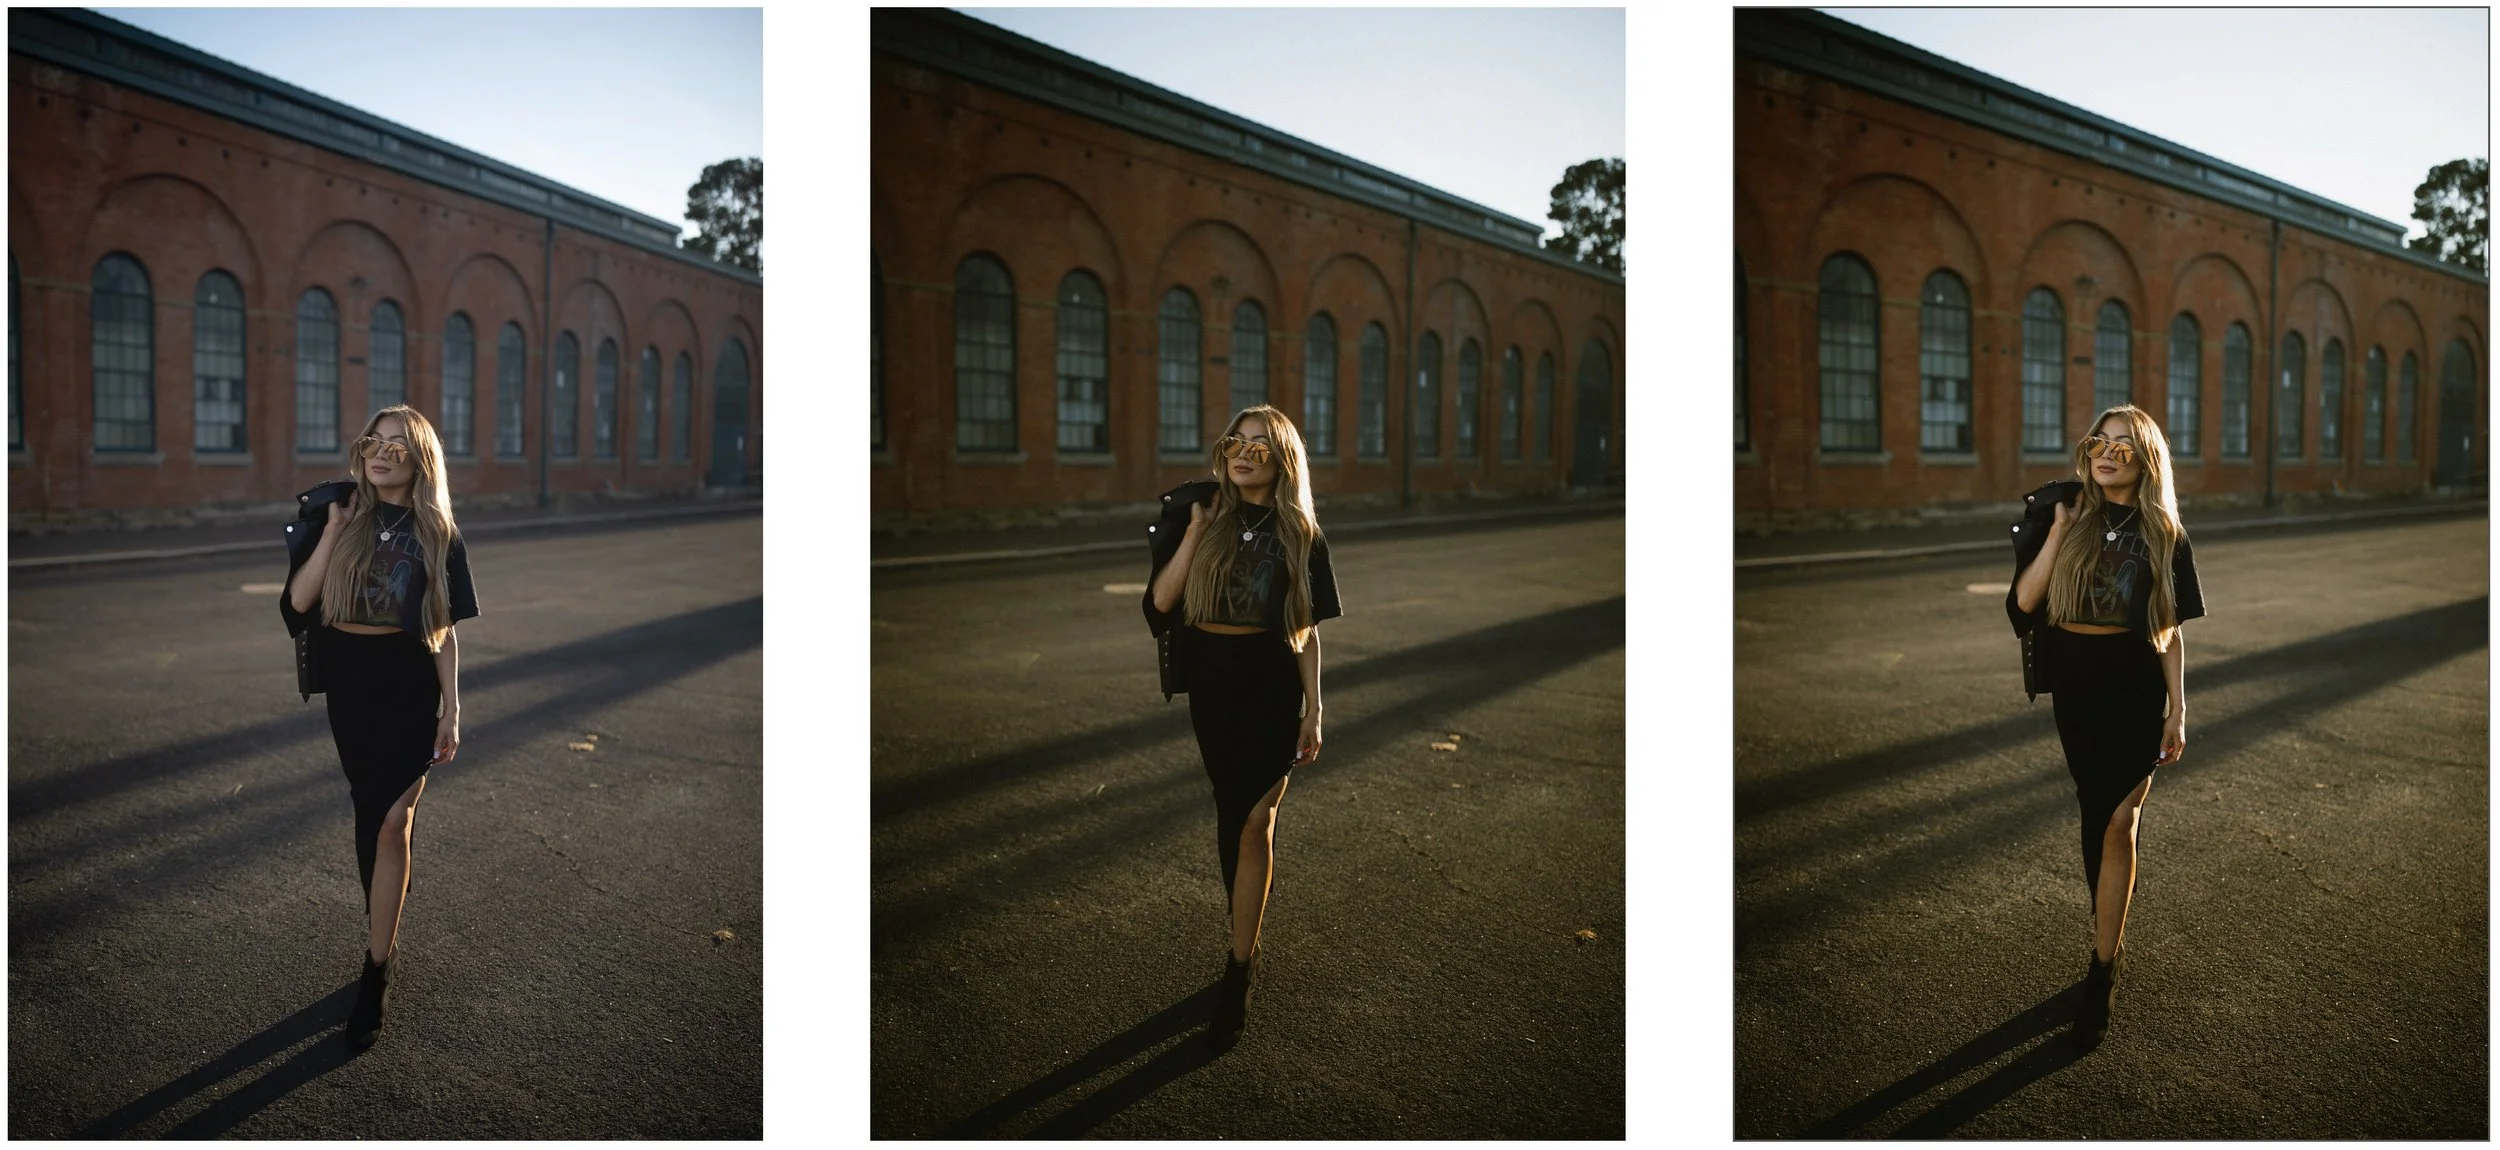
You want to achieve that cinematic, dark and moody look in your portraits? Today, we're diving into an easy-to-follow, step-by-step editing breakdown!
Dark and moody edits can transform a simple portrait into something cinematic and powerful—but if your edit is looking flat, lifeless, or just solid brown, you’re not alone. Many photographers struggle with achieving the right balance of contrast, color, and depth to make their moody edits pop.
Lets dive in!
In this tutorial, I’m breaking down exactly how I edited this neon-lit arcade portrait to achieve a deep, cinematic contrast with rich, moody blacks and a refined color grade.
The Tone Curve is one of the most powerful tools in Lightroom, but for many beginners, it can feel like a mysterious and intimidating graph. If you’ve ever clicked on it, moved a few points, and suddenly wrecked your entire edit. Same...
This guide breaks it all down in a way that makes sense. By the end, you’ll know how to read the tone curve, use it for contrast and color grading, and even create that cinematic matte look that makes photos feel like a scene from a movie.
I know you've seen the histogram, maybe even read a tip or two about how you should be using it. But how many of us actually understand what it’s telling us? If you’ve been ignoring this powerful tool, you might be missing out on crucial information that help with your creative process.
If you’re a histogram expert already, rock on! But if you’re like the many photographers who have messaged me this week asking about it, this guide is for you. Let’s break it down step by step.
I'm going to walk you through the step-by-step process I used to edit this romantic wedding photo. This photo was taken at sunset with pretty harsh sunlight. Let’s work on it together!
First, I experimented with some of my custom Lightroom presets. I knew I wanted a moody, low-contrast look to match the harsh sunset lighting, so I went with my "Moody 02 Low Contrast" preset as a starting point. From there, I started fine-tuning the color and contrast.
Merch & Apparel

No more generic advice from random videos…
No more generic advice from random videos…
I’m here to help you fix your business problems.
Consulting calls are 100% tailored to your current business problem.
The first thing I need is to understand how I can best help you right now. Below is a short questionnaire to gauge where you are at. Website Problems? Client problems? General photography problems? This gives you the opportunity to tell me exactly what problems you need help with before our call so no time is wasted!
Consulting calls are 90 minutes long and I pack as much value as I can into our time. By the end of our call, you will have a clear blueprint of the next steps you will be taking to overcome your current business problem.
Consulting clients have access to my personal phone number to receive feedback and assistance for 30 days! Consulting calls are $97. To get started, fill out the questionnaire below and schedule your free pre-consultation where I’ll answer your most pressing business question.
Each session takes place over a video conference via Zoom. Local, in person consulting is available in the Bay Area (California).

The First one’s on me…
The First one’s on me…
Take a minute and fill out the questionnaire below. This helps me help you! Fill out the form when you are ready to proceed and book your FREE 1:1 Pre-Consultation session.
I am really pumped to get connected with you and get your consulting session scheduled.
As soon as I get this questionnaire sent, you will get an email to schedule your free pre-consultation session with me!
During that free pre-consultation I will answer your most urgent business question you tell me about in the form below, and see if how we can best work together.







“When was my artwork going to pop off?” Why did it feel like everyone else had the secret sauce?